Creating an Eagleview Order
The Eagleview for Salesforce App allows users to create orders either from the Eagleview Order object or directly from Account, Contact, or Opportunity records. Orders placed from standard records are automatically linked to the record for easy tracking.
The app supports two types of reports:
- Bid Perfect Report
- Premium Report
Creating a New Eagleview Order from the Eagleview Order Object
-
Navigate to the "Eagleview Orders" tab.
- You will see a list of existing Eagleview orders.
- Use the prebuilt list views or create your own by applying filters.
-
Click the "New" button.
-
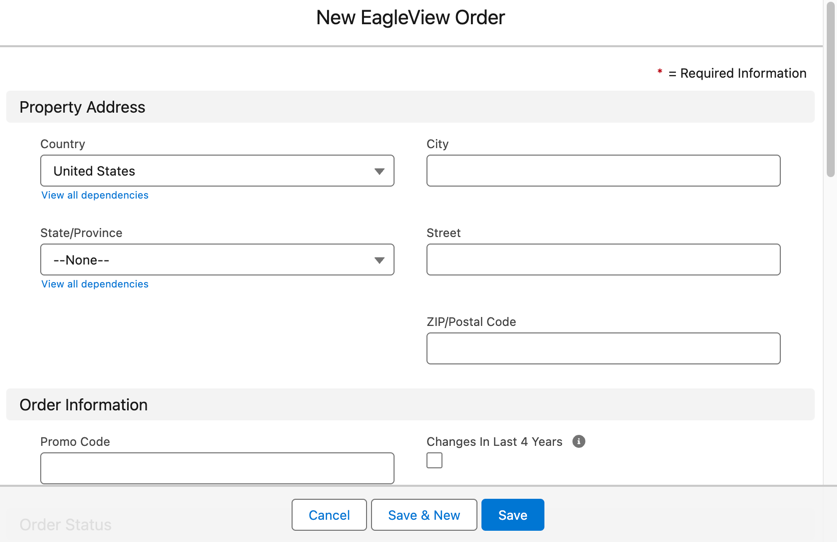
Complete the fields in the "Order Information" section:
- Property Address
- Promo Code (if applicable)
- Changes in Last 4 Years
-
Click "Save".
- The new order record is created.
- The Owner is automatically assigned to the user who created the order but can be changed if needed.
Requesting an Eagleview Report from the Eagleview Order Object
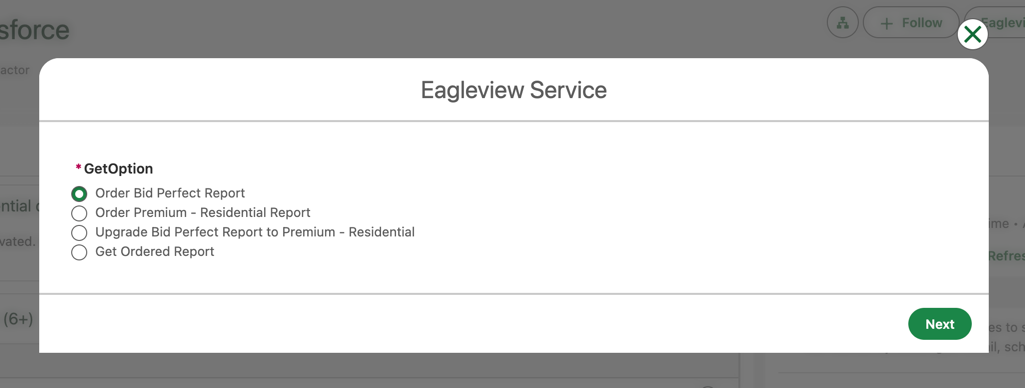
Ordering a Bid Perfect Report
- Open the newly created order record.
- Click the "Eagleview" service button.
- Select "Order Bid Perfect Report".
- Click "Proceed".

Ordering a Premium Report
- Open the newly created order record.
- Click the "Eagleview" service button.
- Select "Order Premium Report".
- Click "Proceed".

Once the order is placed, the system displays a confirmation alert.
- The Report ID and Report Type fields are automatically updated on the order record.
Creating an Eagleview Order from Standard Salesforce Records
You can create Eagleview orders directly from Account, Contact, or Opportunity records. When you place an order this way, it’s automatically linked to that record for easier tracking.
Steps
- Open the record you want to place an order from (Account, Contact, or Opportunity).
- Click the Eagleview Services quick action.
- Choose the Report Type you want to order:
- Bid Perfect Report
- Premium – Residential Report
-
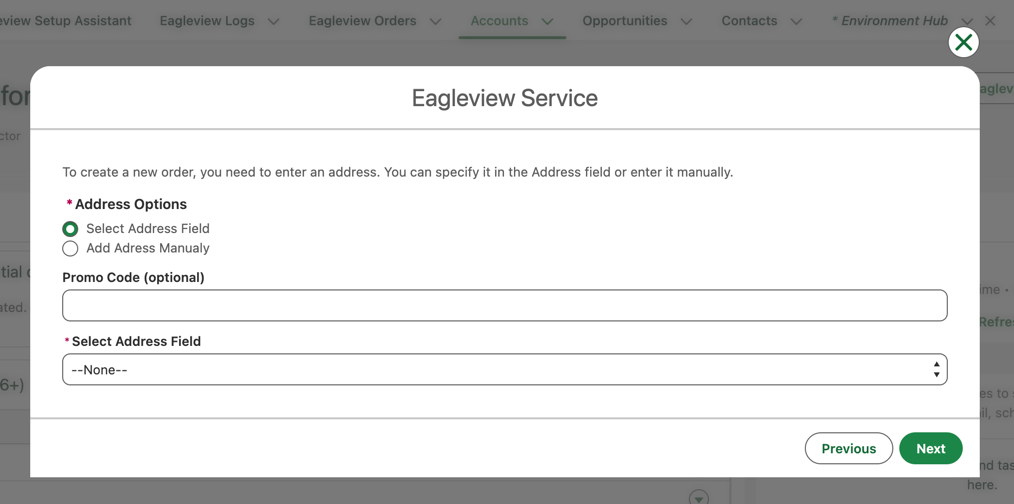
Choose how you want to provide the property address:
a. Select Address Field
- Pick the field on the record that contains the property address.
- Make sure the address follows Eagleview’s accepted format:
- Country must be United States or Canada (no abbreviations).
- State must be written in full, for example Florida or New York (no abbreviations).
b. Add Address Manually
- Manually enter:
- Country
- State
- City
- Street
- ZIP / Postal Code
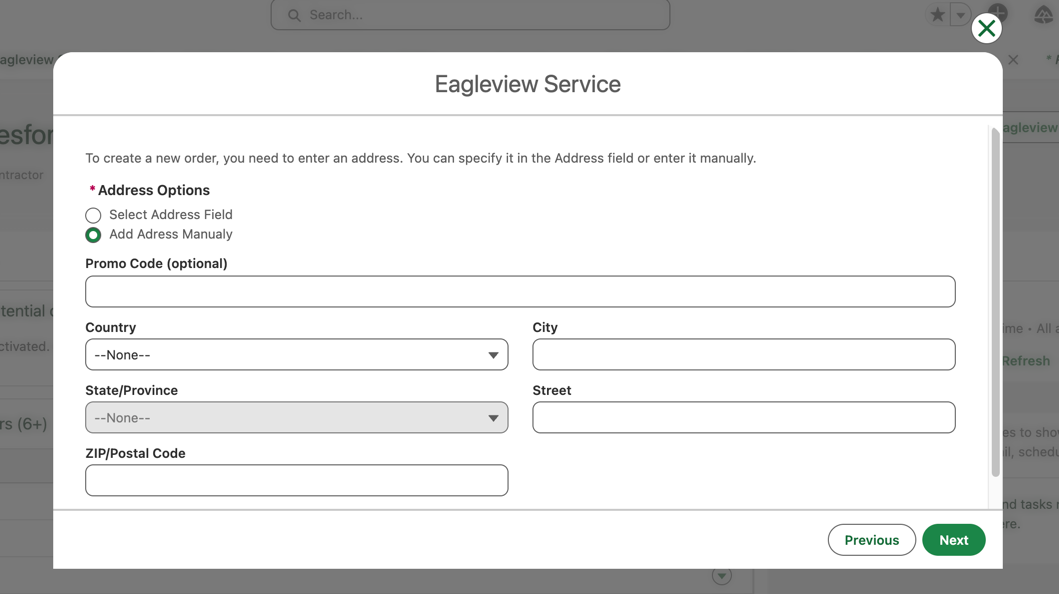
- Add a Promo Code if you have one.
- Click Next.
Once you confirm the details:
- The Eagleview Order record is created.
- The order is automatically submitted to Eagleview for processing.
Tips & Best Practices
- Ensure the Eagleview Services quick action is added to all relevant page layouts.
- The Platform Event Toast component should be added to Lightning record pages to receive real-time notifications.
- Orders created from records save time and ensure proper linking for reporting and follow-up.
- Use validation or layout rules if you want to control which users can place Eagleview orders from standard objects.